Written by: Daniel Koren, Co-Founder, Frameology
The paper template method keeps gallery wall hanging simple and low stress. Lay out your frames on the floor to finalize the arrangement. Trace each frame onto paper to create a life-size template. Mark the exact hardware positions through the paper. Then hammer nails and hang your frames. Frameology’s Classic and Luxe gallery walls include a custom, life-size gallery wall template so you can even skip most of that prep work!
House Beautiful’s review of Frameology confirmed that shipping frames with a true-to-size paper template and nails to mark exact hanging positions results in perfectly aligned frames without the usual measuring headaches.
The reviewer wrote, “I would absolutely recommend Frameology to anyone who knows they want a gallery wall, but does not know how to make it happen.”Key takeaways
-
The paper template method lets you finalize your entire gallery wall layout on the floor, trace frames onto paper, and mark exact nail positions before touching the wall.
-
Consistent 2–3 inch spacing and centering the arrangement at 57 inches from the floor create a balanced, professional look without guesswork.
-
Frameology’s Classic and Luxe gallery walls ship with a custom life-size template so you can skip most prep work.
-
Ready to skip the measuring headaches? Shop Frameology’s ready-to-hang gallery walls and get your custom template delivered with every order.
Tools and supplies for the paper template method
Gather everything first so you can move through the process without stopping.
-
Your frames, already printed and ready to hang
-
A hammer and nails (already included with Luxe gallery walls)
-
A level or mini-level (already included with Luxe gallery walls)
-
A tape measure for the initial center-height mark only
-
Large sheets of kraft paper, butcher paper, or newspaper **
-
A pencil or marker **
-
Scissors **
-
Painter’s tape
** These items are not required if you order a Classic or Luxe gallery wall from Frameology, since it comes with a template already, so you can skip most of the list above and start with the included template.
Four-step paper template method for hanging a gallery wall
This paper template method, recommended by interior design experts, moves all the tricky measuring onto paper before a single nail goes into the wall. With Frameology’s gallery wall template, you can skip steps 1 and 2, making the process even easier!
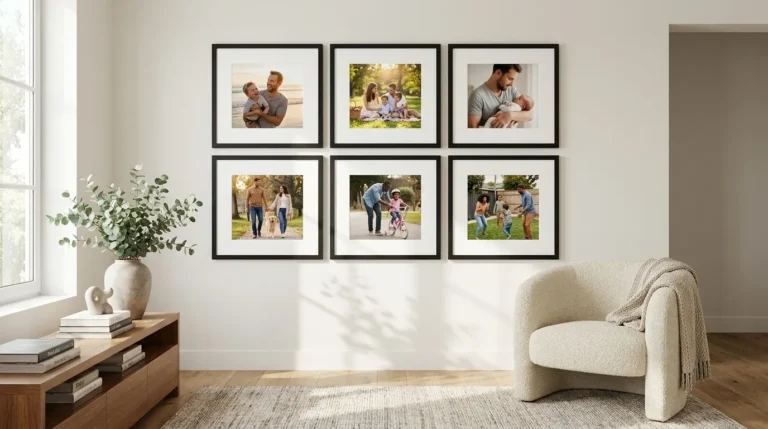
Step 1: Lay out your arrangement on the floor
-
Place all your frames face-up on the floor in front of the wall you are decorating.
-
Start with a focal or anchor piece, typically the largest frame, and build outward from there.
-
Maintain consistent 2–3 inch gaps between frames. Wider spacing makes the grouping look disjointed.
-
Step back and evaluate the arrangement before committing. Adjust until it feels balanced.
Step 2: Create your paper template
-
Lay large sheets of paper over the arrangement on the floor, or trace each frame individually.
-
Draw a precise outline box around each frame on the paper.
-
Label each outlined box with a numbered piece of painter’s tape so you know which frame goes where.
-
Draw a straight horizontal line across the top of the full template and find its center point. This becomes your alignment guide on the wall.
Step 3: Mark the hardware locations
-
Flip each frame face-down onto its corresponding outline on the paper template.
-
Mark the exact position of each hanging hook or wire through the paper.
-
Treat these marks as the precise nail locations. You avoid guesswork and repeated re-measuring.
Step 4: Tape the template to the wall and hammer through it
-
Use painter’s tape to secure the full paper template to the wall at the correct height, explained in the spacing section below.
-
Hammer nails directly through the marked hardware positions on the paper.
-
Carefully tear away or peel off the template.
-
Hang each frame on its corresponding nails. You are done.
Explore Frameology’s gallery walls with included templates.
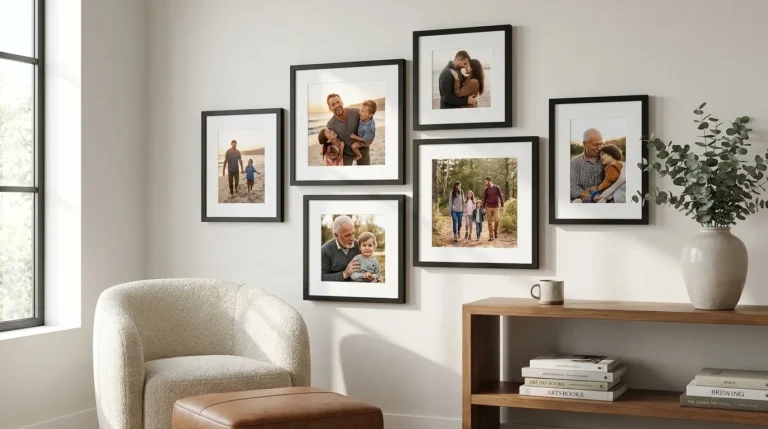
Gallery wall spacing and height above a sofa
Two simple measurements create a professional-looking gallery wall that feels intentional and balanced.
-
Frame spacing: Interior design experts recommend keeping frames 2–3 inches apart throughout the arrangement. Consistent spacing separates a curated gallery wall from a cluttered one. Mixing gap widths in the same composition weakens the overall effect.
-
Center height: The standard guideline used by galleries and interior designers is to position the center of the artwork, or the center of the entire gallery wall grouping, at 57 inches from the floor. This aligns with average eye level and produces a natural viewing experience. For rooms with taller ceilings, the center can be raised slightly to 58–60 inches for better proportion.
-
Above a sofa: Wall art above a sofa should sit 6–8 inches above the back of the couch, centered horizontally with the furniture. This keeps the artwork visually connected to the seating area instead of floating on the wall. The overall gallery wall grouping should span roughly two-thirds the width of the sofa for proper scale.
When taping your gallery wall template to the wall, measure up to 57 inches from the floor, mark the center of the template at that point, and tape accordingly. That single measurement handles the height for the entire arrangement.
Renter-friendly gallery wall ideas
Renters can still enjoy a polished gallery wall while keeping wall damage to a minimum.
-
Damage-free adhesive strips: Adhesive hanging strips hold lightweight frames on smooth drywall and remove cleanly with no residue when instructions are followed. These strips work well for Classic frames. Adhesive strips are not recommended for Luxe frames, which have a sealed permanent kraft paper backing that could be damaged during removal.
-
Picture rails: Picture rails support heavy or multiple pieces of art with perfect removability and no wall damage beyond the rail installation holes. This trade-off suits renters who want a permanent-looking display.
-
The paper template method itself: Even when you use traditional nails, the gallery wall template limits holes to exactly the number needed. Zero extra holes means minimal patching when it is time to move out.
Frameology’s Classic gallery walls, starting at $198 for the Classic Stack II, are particularly helpful for renters. The included gallery wall template ensures you nail in only the right spots, and the Classic frames’ single center-point hanging system is straightforward to patch and repaint when needed. Although if you’re using adhesive strips instead, place the strips along the edges of the frame instead of the center hanging point.
Common gallery wall challenges and quick fixes
Even with a gallery wall template, a few common issues can come up during installation. Here’s how to handle them.
-
Frames hanging crooked: Classic frames use a single center hanger, so bring your own level to check alignment after hanging. Luxe frames use a two-point side-hanger system for built-in leveling stability, and a mini-level is included in the box.
-
Template shifting while hammering: Use more painter’s tape than you think you need. Tape all four corners and the center of the template before driving any nails.
-
Grouping looks too small for the wall: Artwork should fill 60–75% of the blank wall space. If the arrangement looks sparse, consider a larger layout or add frames to the grouping before committing to nails.
-
Arrangement looks unbalanced: Return to the floor layout stage. Swap the anchor piece or shift asymmetric frames to the opposite side. Solving this on the floor is far easier than adjusting on the wall.
-
Not sure how it will look before hanging: Frameology’s mobile augmented reality (AR) tool, augmented reality, lets you project a true-to-scale preview of your exact gallery wall onto your actual wall using your phone. You can do this before ordering, let alone hanging. The AR tool allows you to preview a gallery wall by choosing a layout, uploading photos, and visualizing it on your actual wall in minutes.
Measuring success checklist
Use this checklist to confirm your gallery wall looks intentional and professionally planned.
-
Gallery wall center is at 57 inches from the floor to align with average eye level.
-
Bottom of the lowest frame sits 6–8 inches above the sofa or furniture to keep a visual connection with the seating area.
-
Frame spacing matches the 2–3 inch guideline to create a cohesive, curated appearance.
-
Overall grouping spans roughly two-thirds the width of the furniture below for proper scale.
-
All frames are level, use the included mini-level for Luxe, bring your own for Classic.
-
No extra holes in the wall beyond the nail positions marked on the gallery wall template.
-
You have stepped back and viewed the wall from across the room before calling it done.
Frequently asked questions
Do all gallery walls include hanging templates?
Classic and Luxe gallery walls include life-size gallery wall templates that make installation simple and straightforward. Canvas galleries, Metal galleries, and gallery walls created using Frameology’s Gallery Wall Design Service do not include templates because their construction and customization work differently and often require more tailored installation approaches.
How long does it take to hang a Classic gallery wall using the template?
Most people complete the installation of a Classic gallery wall in under an hour using the included gallery wall template. The template marks every nail position precisely, so there is no back-and-forth measuring. Tape it up, hammer through the marked spots, remove the template, and hang your frames.
What is the difference between Classic and Luxe gallery walls?
Classic gallery walls, starting at $198, use Classic frames with a removable backing, a single center-point hanger per frame, and fast shipping. They typically ship the next business day and arrive within a week. Luxe gallery walls, starting at $638, use museum-quality, American-crafted Luxe frames with a sealed permanent kraft paper backing, a two-point side-hanger system for precise leveling, and all hanging hardware, including nails and a mini-level, in the box. Both Classic and Luxe galleries include a life-size gallery wall template, with slightly different instructions for Luxe because of the dual-point hanging system. Luxe products take 7–10 business days due to their artisan craftsmanship.
Can I use adhesive strips instead of nails for a gallery wall?
Adhesive strips are a practical renter-friendly option for Classic frames on smooth drywall surfaces. You may also use adhesive strips with Canvas gallery walls, but keep in mind that these types of galleries do not come with a gallery wall template. They are not recommended for Luxe frames, which have a sealed permanent kraft paper backing that could be damaged if adhesive strips are removed. For Luxe gallery walls, the included nails and two-point hanging system are the right approach, and the gallery wall template ensures you only make the holes you need.
How do I know which gallery wall layout is right for my wall?
Start by measuring your wall width and comparing it to the two-thirds furniture rule. The overall grouping should span roughly two-thirds the width of the sofa or furniture below it. Frameology offers layouts ranging from compact two-frame sets to large multi-frame grids and staircases. The mobile AR tool on Frameology’s website lets you preview any layout on your actual wall before purchasing, which removes the guesswork from the decision.
Ready to hang your own gallery wall?
The paper template method turns what feels like a weekend project into a 30-minute task. Frameology’s Classic and Luxe gallery walls take it a step further by including a custom, life-size gallery wall template with every order. With over 7,300 verified five-star reviews and 30+ years of framing heritage behind every product, Frameology offers a fast path from inspiration to a wall that actually looks the way you imagined it.
Classic gallery walls start at $198. Luxe gallery walls start at $638. Both include the gallery wall template and keep measuring to a minimum.