Written by: Daniel Koren, Co-Founder, Frameology
Key takeaways
-
The 57-inch rule and 2–3 inch spacing create an intentional, museum-quality look for any large gallery wall.
-
Modern 2026 gallery walls succeed through intentional editing, cohesive color palettes, and personal storytelling rather than random collections.
-
Frameology’s Classic and Luxe gallery walls include life-size templates that eliminate guesswork and keep installation under an hour.
-
Ready to build an editorial gallery wall? Start framing your favorite memories at Frameology.
The 57-inch rule and spacing standard for large gallery walls
Center the middle of your gallery wall at 57 inches from the floor, treating the entire display as one piece. This matches the standard used by museums and interior designers worldwide. Keep spacing between individual frames at 2–3 inches so the grouping feels cohesive without crowding. Apply these two numbers consistently and the wall looks intentional every time.
Why gallery walls still feel current in 2026
Gallery walls remain highly relevant in 2026 when they feel edited and thoughtful. Modern versions favor intentional editing, restrained color palettes of two or three tones, and personal storytelling instead of random assortments.
Personalized photo walls that mix family photos, travel shots, and fine art prints within a cohesive palette remain a powerful trend for 2025–2026. These sit comfortably alongside oversized statement pieces as equally popular formats. A curated large gallery wall reads as editorial, while a cluttered one feels like an afterthought.
Color-blocked gallery walls are a key 2026 trend. They group artwork within a single cohesive color palette while mixing subjects and styles for bold visual impact without chaos. When your frames, mats, and photos share a tonal family, you are already ahead of most Pinterest boards. With these design principles in place, you can explore specific layout options for your large gallery wall.
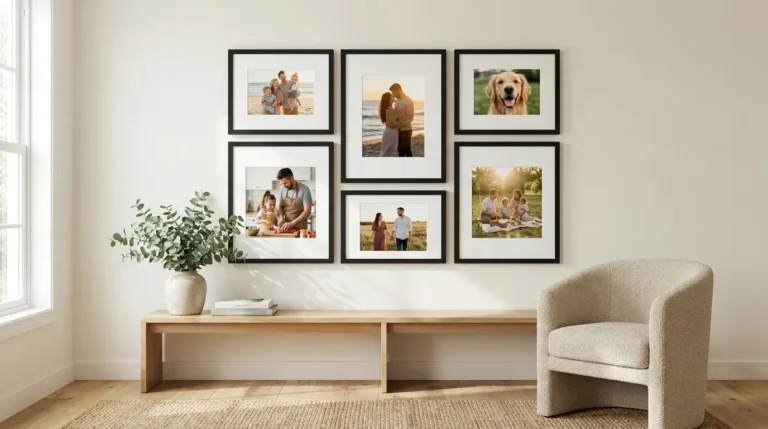
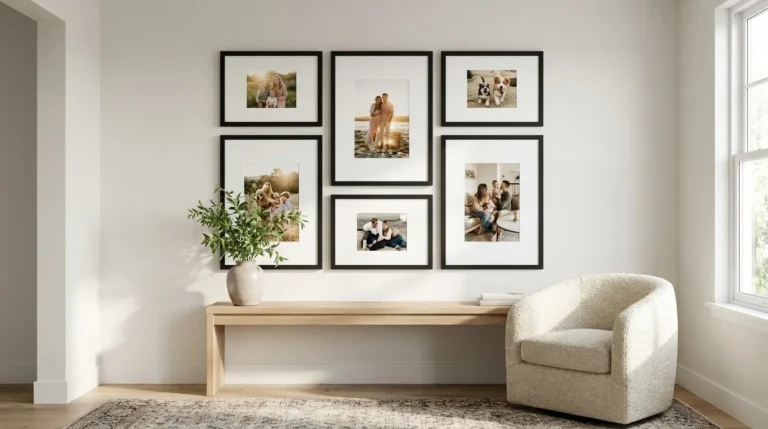
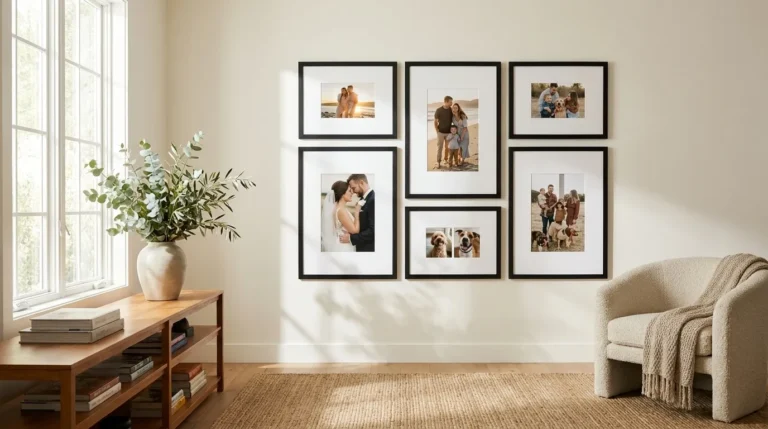
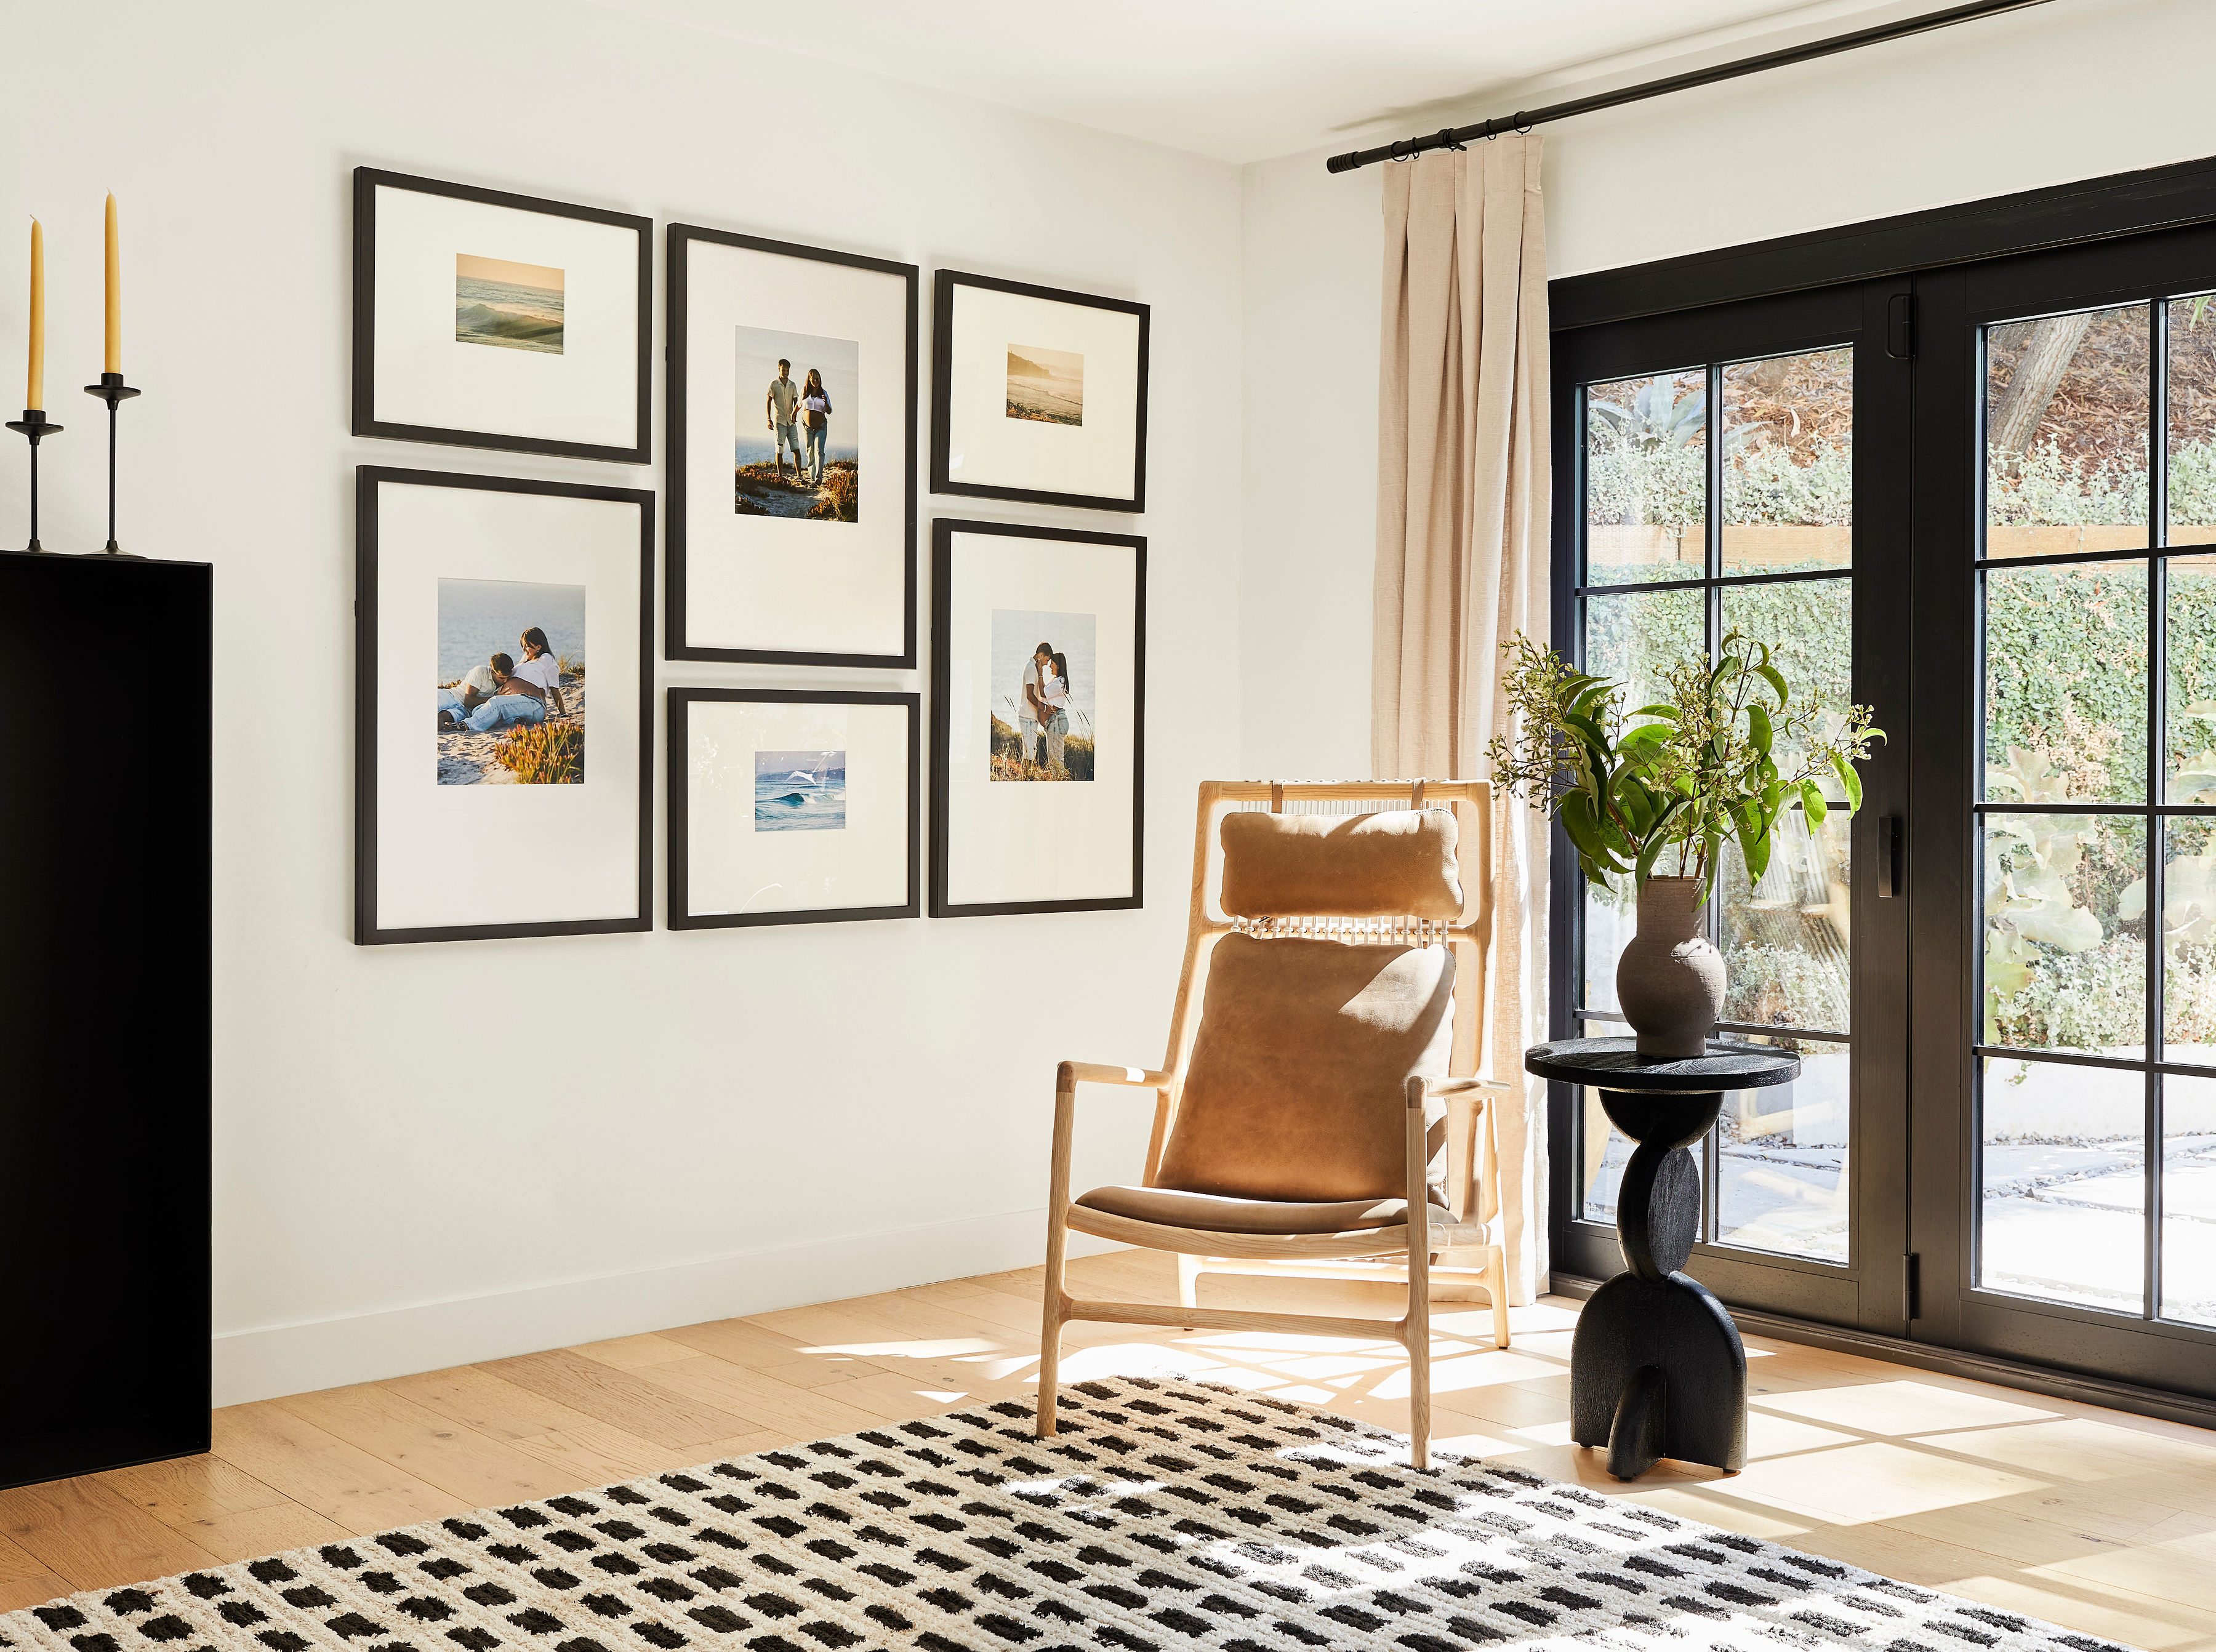
Symmetrical grid layout for a polished look
Grid layouts create a strong sense of order with frames aligned evenly and consistent spacing throughout. They produce a calm, polished look that works especially well in modern interiors and refined spaces. Above a sofa or console, a grid should span roughly two-thirds of the furniture width beneath it.

To achieve this structured look, maintain 2–3 inches between every frame edge and center the entire arrangement at 57 inches from the floor. These spacing and height standards are exactly what Frameology’s Classic Grid ($594) and Classic Grid II ($675) are designed to deliver. The Luxe Vertical Grid ($981), described by Bobby Berk as “like an Instagram feed for your wall” brings museum-quality materials to the same structured format.
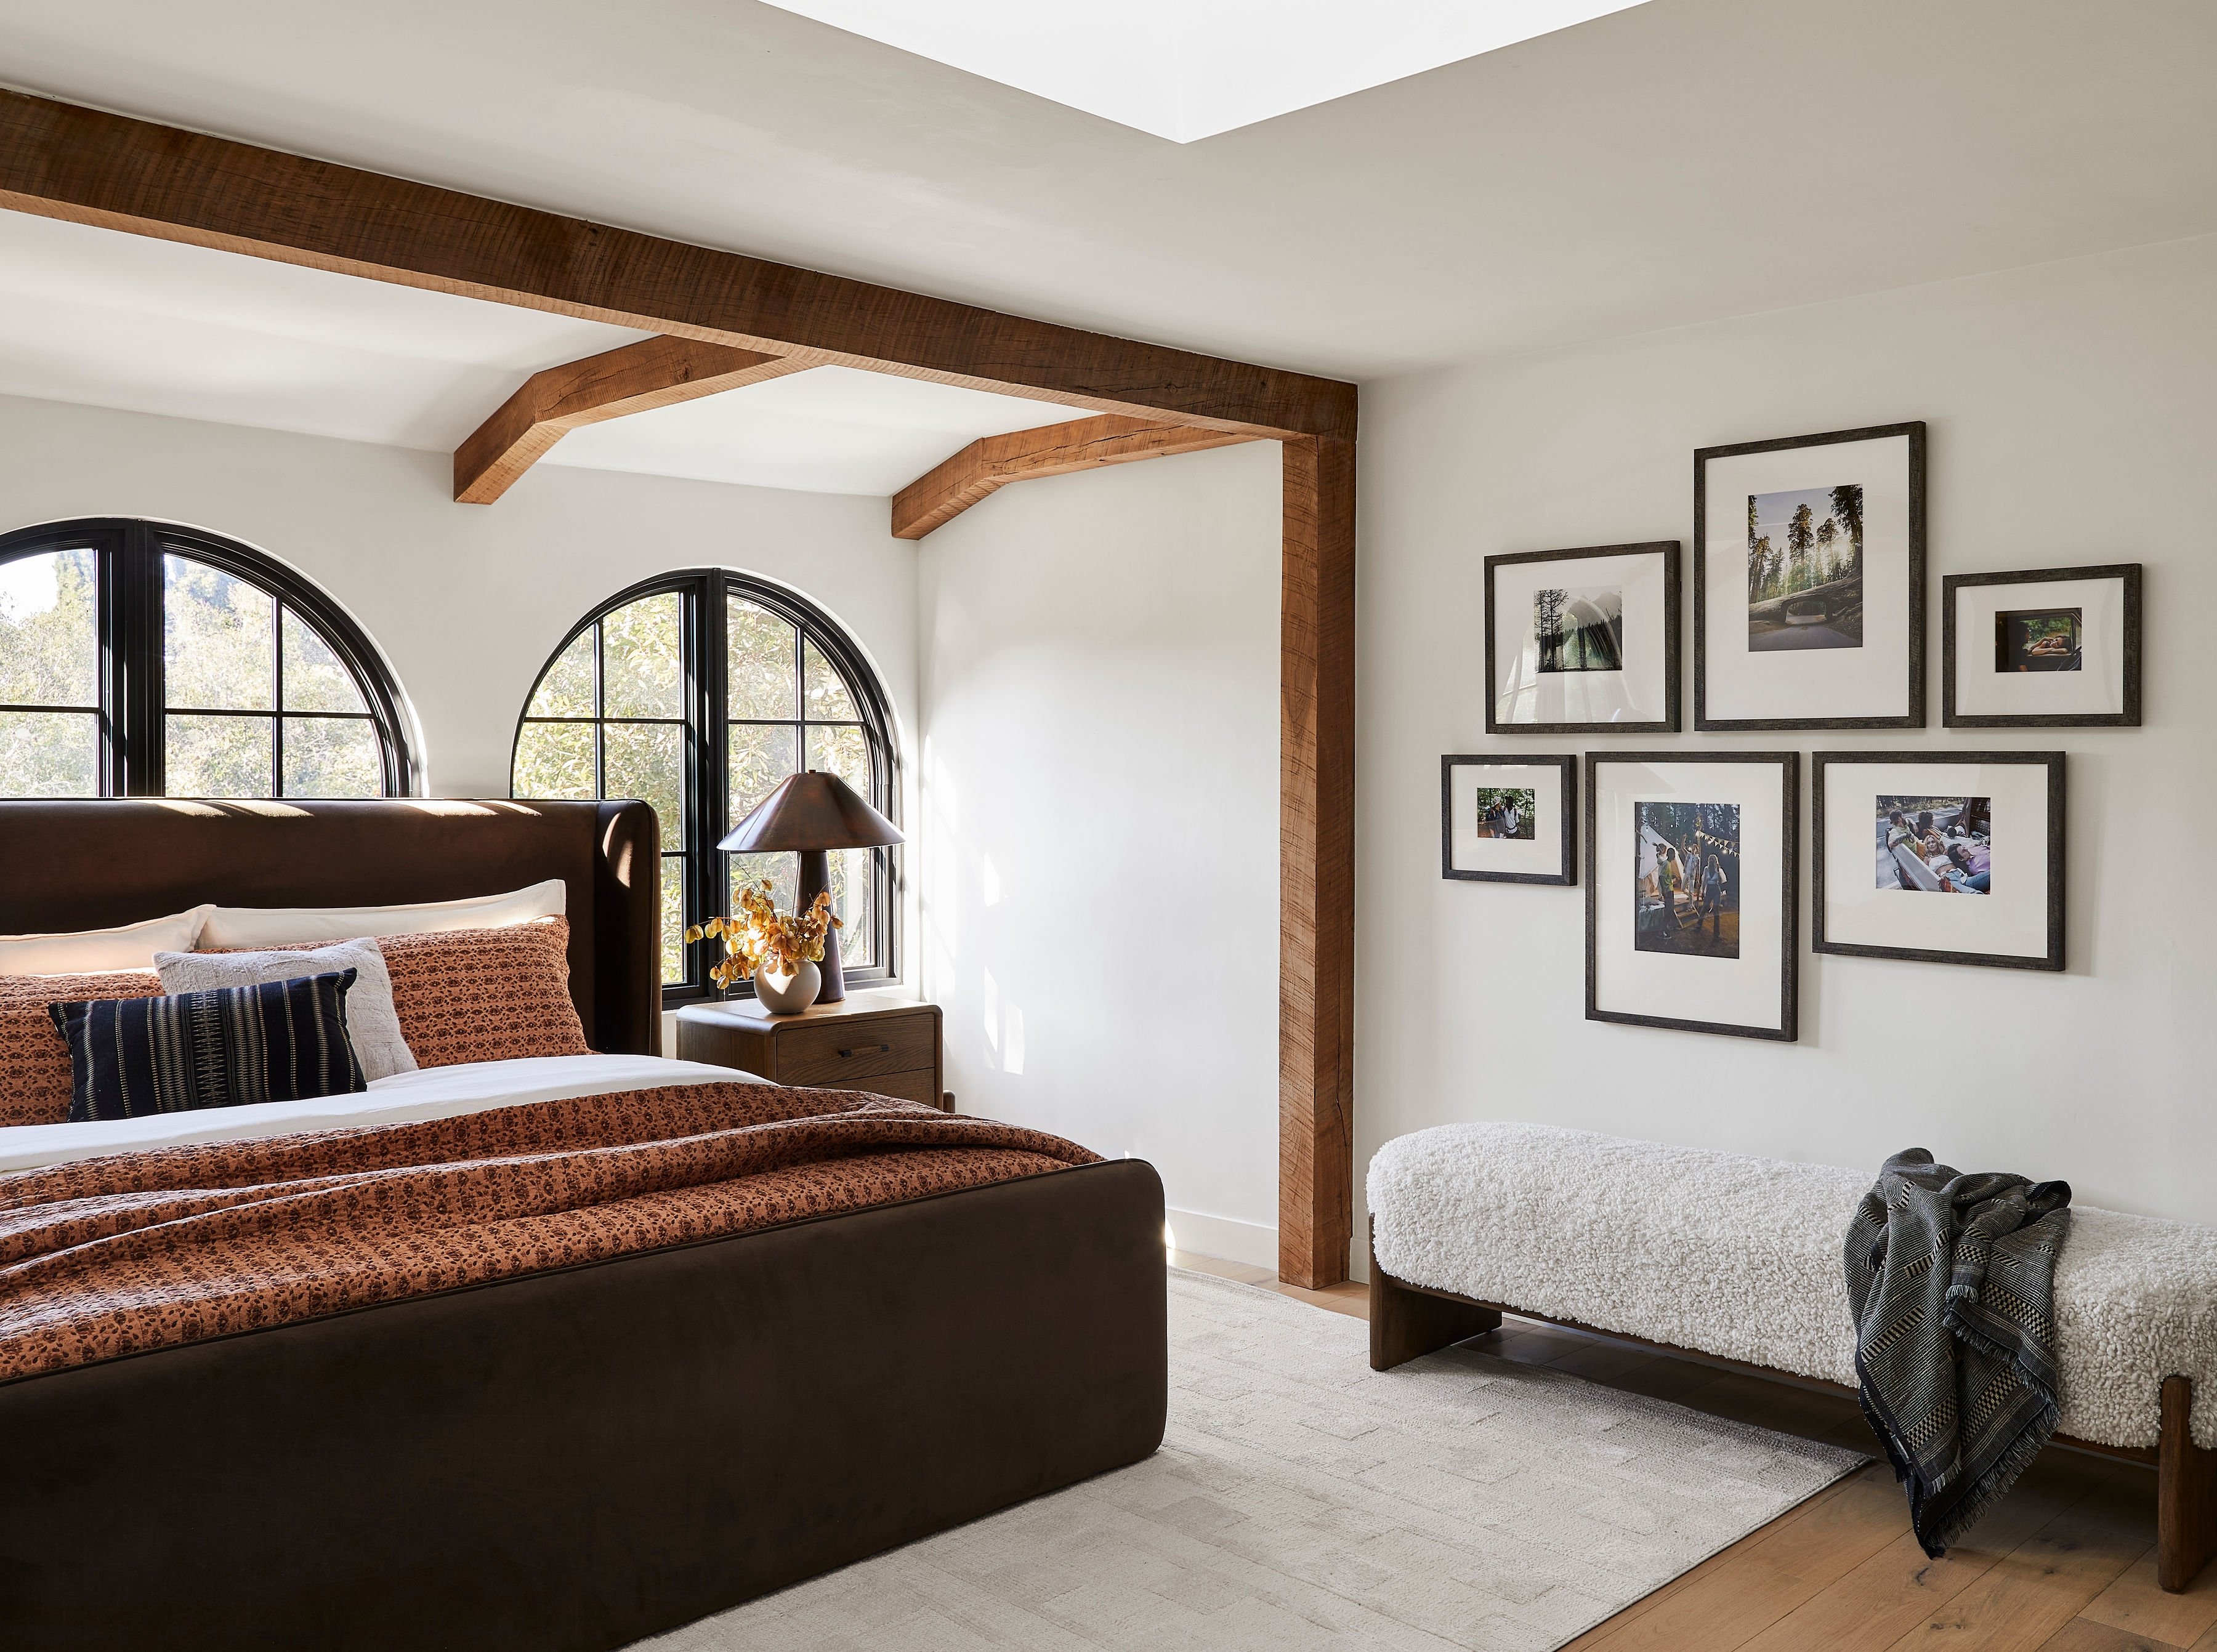
Organic layout for relaxed storytelling
Organic layouts arrange frames within a loose shape rather than strict lines. This makes it easier to mix different sizes, styles, and artwork while suiting hallways, staircases, and spaces above and across the width of a couch. The arrangement can grow over time without disrupting the overall composition. Some organic layouts include:
Asymmetrical gallery walls have become increasingly popular as a dynamic alternative to traditional symmetrical layouts. They often build outward from a central anchor piece with loosely aligned outer edges for cohesion. Keep spacing at 2–3 inches and anchor the center of the grouping at 57 inches from the floor to avoid the “floating” effect that makes salon walls look accidental.
Hallway layout for streamlined runs
Hallways shine with horizontal runs of frames hung at a consistent eye level. Because viewers are standing and moving, kitchens and hallways benefit from hanging artwork at the higher end of the 57–62 inch range. Tight spacing of 2–3 inches helps the run read as one cohesive statement instead of separate pieces.
The Classic Hallway ($466) and Classic Hallway II ($466) are designed specifically for this format. The Luxe Hallway ($914) uses museum-quality, USA-crafted frames with a dual-point hanging system for added stability along long runs.
Ledge layout for flexible, renter-friendly displays
Floating shelves create a gallery wall that needs no extra nail holes once the ledge is installed. Floating-shelves gallery walls incorporate ledges to display framed photos alongside objects, books, and plants. This approach offers easy rearrangement and added dimension that works well in living rooms.
This layout works especially well for renters. Install one or two ledges with minimal hardware, then layer Classic frames along the shelf. Classic frames feature a removable backing for easy photo swaps, so rearranging the display creates zero additional holes. The Classic Wall (starting at $59) suits ledge displays because of its lightweight design and single-center hanger.
Staircase layout for ascending memories
A staircase wall offers one of the most underused canvases in a home. Frames follow the diagonal rise of the stairs, creating a dynamic ascending line. Bobby Berk describes the staircase gallery wall as “the perfect place to display family photos” and notes that a well-designed staircase layout makes it much easier to curate favorite memories into an arrangement that looks intentional.
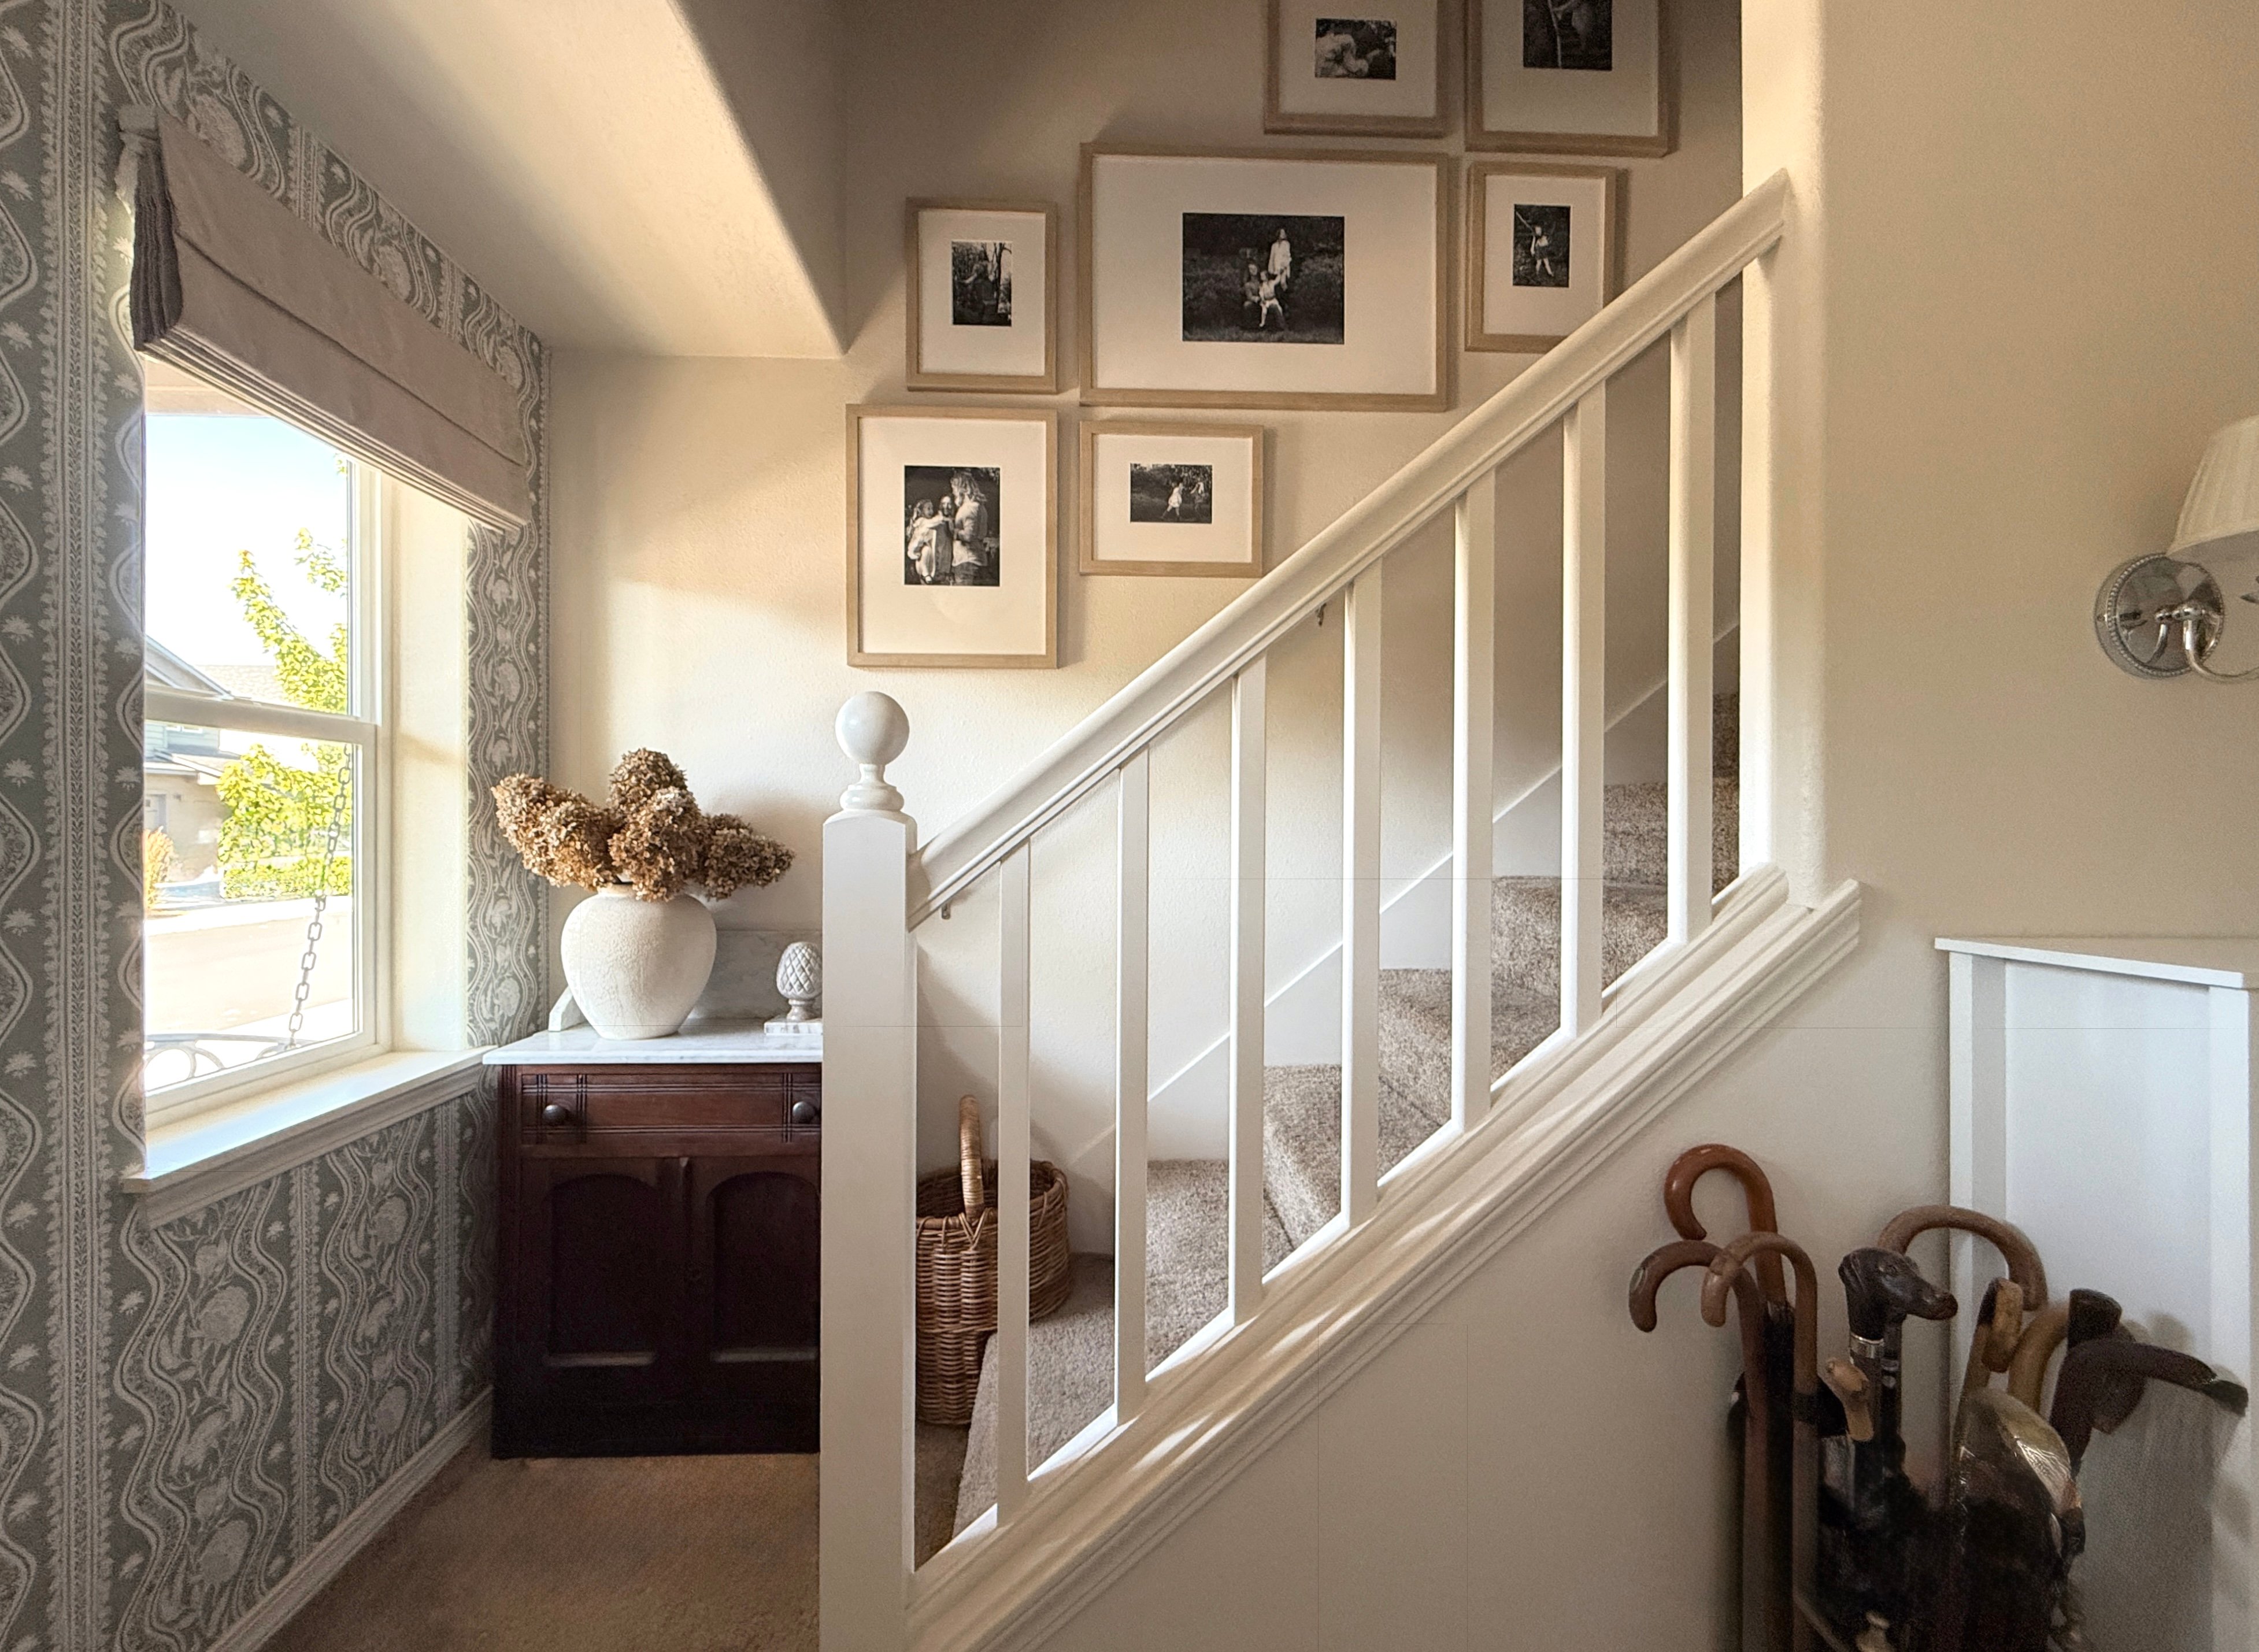
Frameology offers three Classic staircase options: Classic Staircase ($308), Classic Staircase II ($485), and Classic Staircase III ($635). Additionally, the premium Luxe Staircase ($953) offers the same diagonal flow with museum-quality materials. Every staircase option includes a life-size gallery wall template for precise placement along the rise.
Mixed-media layout for depth and texture
Modern gallery walls frequently incorporate mixed-media compositions, such as small ceramics or low-relief sculptural accents alongside framed prints. This adds depth while still feeling intentional when spacing and moderation stay consistent.
The practical rule stays simple: keep frame finishes consistent, whether all black, all natural wood, or all metal, even when you mix print sizes and subjects. This visual consistency matters even more when you add non-framed elements. Maintain 2–3 inches of spacing between every element, framed or not, so the composition feels tied together. Once spacing feels balanced, center the entire arrangement at 57 inches from the floor as a single unit.
Other unique gallery wall layouts
The Luxe Bricklay ($1,074) features six custom-framed photos on archival paper inside solid wood frames with museum-grade acrylic glazing, reviewed by CNN Underscored as a premium investment worth making. This layout offsets rows of frames in an alternating pattern, which creates movement while keeping a sense of symmetry. Bobby Berk describes the Bricklay as “versatile, simple, and symmetrical,” inspired by the way bricks are laid in a stairstep pattern. It uses two different frame sizes to recreate that effect.
Common gallery wall mistakes to avoid
The most common mistake when hanging art or gallery walls is placing pieces too high on the wall, which forces viewers to crane their necks. The fix stays the same every time: center the entire grouping at 57 inches from the floor, not each individual frame.
Other frequent errors include:
-
Spacing frames too far apart: gaps larger than 3 inches make the grouping feel disconnected instead of cohesive.
-
Choosing art too small for the wall: frames that are too small for the wall make even correctly positioned installations feel awkward and unbalanced.
-
Ignoring the furniture below: artwork hung over furniture should generally be less than 75% of the furniture width and positioned 4–8 inches above the furniture top.
-
Drilling without a plan: using painter’s tape to map out placement before hanging helps visualize spacing and alignment and reduces errors.
-
Tilting frames: a mini-level eliminates this entirely, and Luxe frames include one in the box.
Avoiding these mistakes becomes much easier when you use a clear installation system instead of guessing.
How to hang a large gallery wall without the headache
The template-driven process turns a potentially frustrating afternoon of measuring into a straightforward project. Frameology ships frames with a true-to-size paper template and nails to mark exact hanging positions on the wall. Here is how the process works for each line:
Classic gallery wall installation
Follow these steps to hang your Classic gallery wall:
-
Unbox your Classic gallery wall and locate the life-size gallery wall template.
-
Tape the template to the wall at your desired height.
-
Hammer the included hardware into the marked spots through the template.
-
Remove the template.
-
Hang each Classic frame from its single center hanger. No residue and no unnecessary holes!
The entire process typically takes under an hour.
Luxe gallery wall installation
Follow these steps to hang your Luxe gallery wall:
-
Unbox your Luxe gallery wall and locate the life-size gallery wall template.
-
Tape the template to the wall and create dimple marks at each indicated point.
-
Hammer the plastic markers and nails into the wall at the marked positions.
-
Remove the template.
-
Hang each Luxe frame using its dual-point side hangers for precise leveling, then confirm alignment with the included mini-level.
Luxe frames use museum-quality construction, including premium materials and sealed backs, so the finished wall feels permanent and polished.
Choosing the right gallery wall for your space and budget
Classic gallery walls start at $198 and use Classic frames, which are hand-framed in the USA and feature a removable backing. You can swap photos whenever a new memory deserves the wall. Individual Classic frames within the collection start at $59 for Classic Wall. Classic products have fast shipping and typically arrive within a week.
Luxe gallery walls start at $638 and use frames that are 100% made in the USA from premium solid wood and metal moldings, acid-free mats, and UV-protecting museum-grade acrylic. Luxe frames feature a sealed, permanent kraft paper backing, so photos stay protected but cannot be swapped. Individual Luxe Wall frames start at $79. All necessary hanging hardware, nails, and a mini-level come in the box. Luxe products deliver within 7–10 business days.
Both lines include a life-size gallery wall template. Choose Classic for fast, flexible, high-value framing or Luxe for museum-quality permanence.
Renter-friendly large gallery wall options
Renters have three strong paths for large gallery walls. The first is the ledge approach: install one or two floating shelves with minimal hardware and layer Classic frames along them. Because Classic frames have a removable backing, you can refresh photos without touching the wall again. Design experts advise against drilling numerous holes to perfect a gallery wall in a rental, since this often creates unnecessary damage at move-out.
The second path is using adhesive strips with Classic galleries. Adhesive strips hold Classic frames securely without drilling a single hole, making them a practical choice for renters who want a traditional framed look on the wall. It’s important to note that they cannot be used with Luxe galleries, as the strips may damage or rip the permanent paper backing on Luxe frames.
The third path is canvas. Canvas galleries start at $135 and are lightweight enough to also hang with damage-free adhesive strips on most wall surfaces. Canvas galleries do not include a gallery wall template, so layout planning works best with a floor mockup or painter’s tape test before hanging.
Measuring success after installation
After the gallery wall is up, run through this quick checklist:
-
Center of the entire grouping sits at 57 inches from the floor.
-
Spacing between every frame is 2–3 inches and stays consistent throughout.
-
Bottom of the arrangement sits 6–8 inches above any furniture beneath it.
-
Total width of the grouping covers roughly two-thirds of the furniture width below.
-
Every frame is level, using the included mini-level for Luxe frames or a standard level for Classic frames.
-
No frames are tilting and all hangers are fully seated on their nails.
If all six points check out, the wall is ready. Step back, take the photo, and share it.
Frequently asked questions
What is the 57-inch rule for gallery walls?
The 57-inch rule means the center of your gallery wall, treated as one unified piece, should sit 57 inches from the floor. This height corresponds to average eye level and is the standard used by museums and interior designers. Apply it to the midpoint of the entire arrangement, not to each individual frame.
How far apart should frames be in a large gallery wall?
The widely recommended spacing is 2–3 inches between frame edges. Gaps smaller than 2 inches can feel crowded, while gaps larger than 3 inches make the grouping look disjointed. Consistent spacing throughout the arrangement matters more than the exact number within that range.
Do all gallery walls include hanging templates?
Classic and Luxe gallery walls include life-size gallery wall templates that make installation simple and straightforward. Canvas galleries, Metal galleries, and gallery walls created using Frameology’s Gallery Wall Design Service do not include templates because their construction and customization work differently and often need more tailored installation approaches.
What is the difference between Classic and Luxe gallery walls?
Classic gallery walls start at $198 and use hand-framed-in-the-USA Classic frames with a removable backing, so photos can be swapped over time. They have fast shipping and typically arrive within a week. Luxe gallery walls start at $638 and use frames that are 100% made in the USA from premium solid wood and metal moldings, acid-free mats, and museum-grade acrylic. Luxe frames have a sealed permanent backing, so photos cannot be swapped, and they come with all hanging hardware, nails, and a mini-level included. Luxe products deliver within 7–10 business days. Both lines include a life-size gallery wall template.
How do I plan a large gallery wall without making too many holes?
The most reliable method is a life-size gallery wall template, which marks every nail position precisely before a single hole is made. Frameology’s Classic and Luxe gallery walls include this template. For layouts without a template, lay all frames on the floor first to finalize the arrangement, then trace each frame onto paper, cut out the shapes, and tape them to the wall with painter’s tape to test placement before drilling. This approach removes guesswork and keeps unnecessary holes to zero.
Are large gallery walls suitable for renters?
Large gallery walls can work well for renters with the right strategy. Ledge-based displays require only the shelf hardware and allow unlimited rearrangement of Classic frames without additional holes. Canvas galleries are lightweight enough for damage-free adhesive strips on most wall surfaces. For renters who do want to use nails, Frameology’s gallery wall templates ensure every hole is intentional, with no test holes or misaligned attempts.